How to Setup the Connection for Windows 8 (Internet Connection)
How to Setup the Connection for Windows 8 (Internet Connection)
For 「How to connect to the wireless network create by the Life Stick」, 「How to connect to the internet using the LAN cable directly」. Please check the settings below.
■How to set the connection to the Wireless Network(wifi)
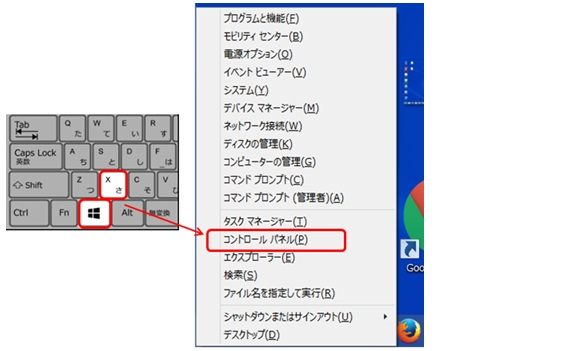
①While holding the「Windows」key, press the「X」key.
Select the Control Panel.
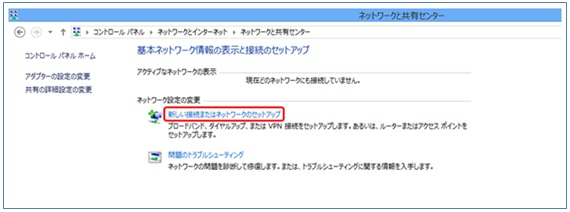
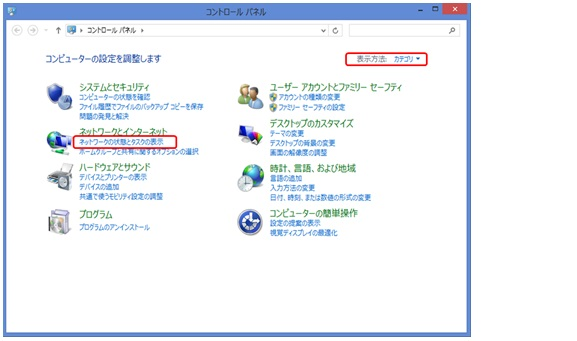
②Set the display as「Category」, inside the [Network and Internet] select「Network Status and Task Display」.
(※In case the display is not 「Category」select「Network and Sharing Center」.)
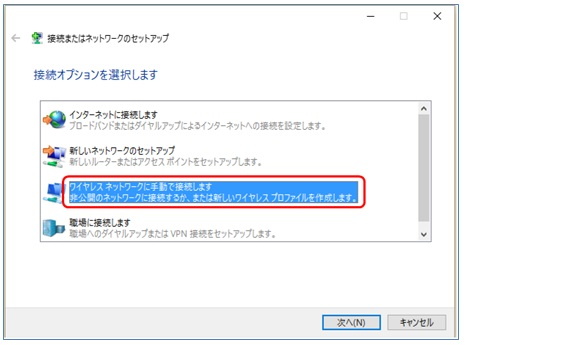
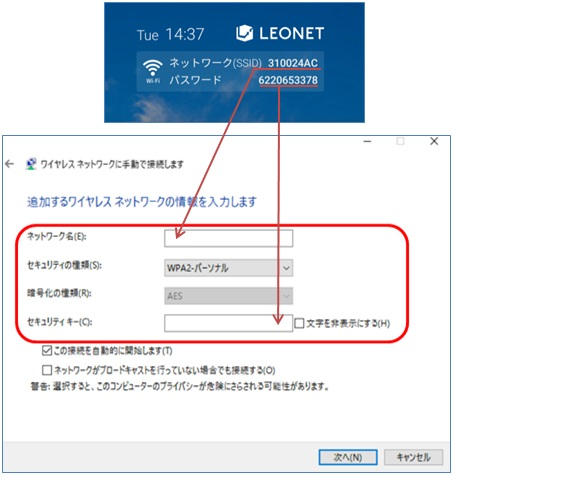
⑤Select Input network information.(Check the top right of the main Leonet screen on your television)
Network name:Select the SSID displayed
Security type:Select「WPA2-Personal」
Encryption type:Selection is not necessary
Security key:Input the password displayed on the TV screen
Your setup is finished.
■How to connect to a wired network
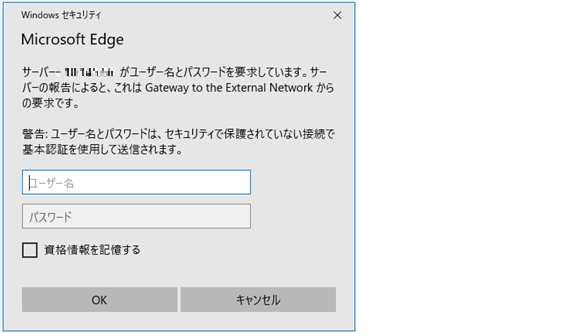
If you are connecting the LAN cable, that comes out from the wall, directly into your Personal Computer or into your Router, the following screen will display on your browser.
If the following screen shows up, after inputting your LEONET ID and Password, you will be able to connect to the internet.
No further setup is needed.
※Depending on your OS the display screen may differ.
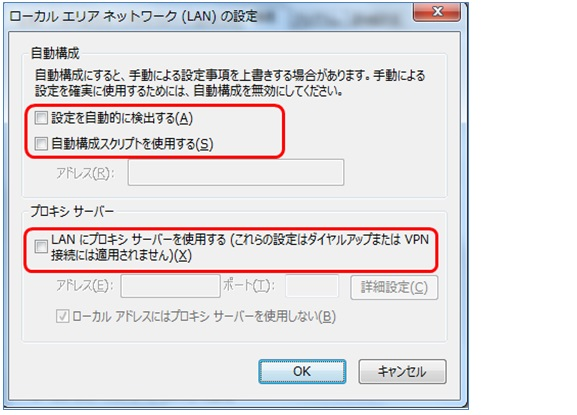
If the screen above does not appear, use the configuration below.
①While holding the「Windows」key, press the「X」key.
Select the Control Panel.
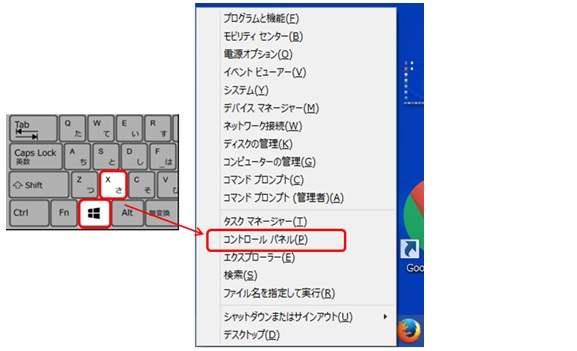
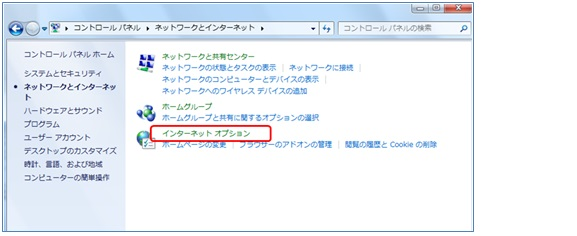
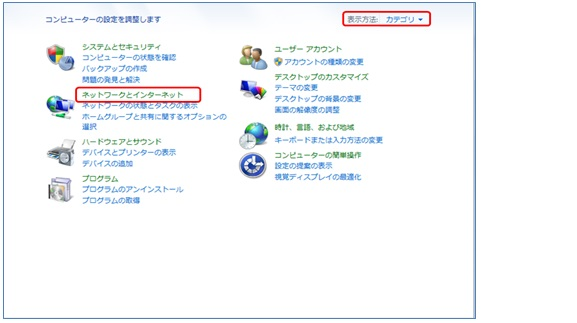
②Select the display as「Category」, and select「Network and Internet」.
※In case the display is not on「Category」select「Internet options」, and proceed to step ④.
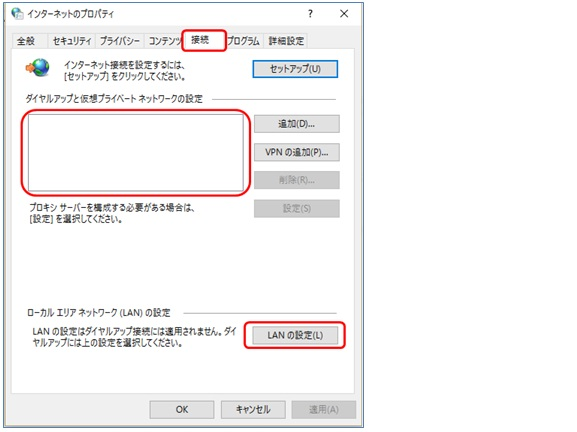
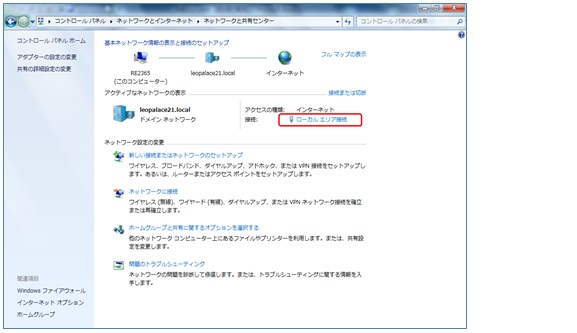
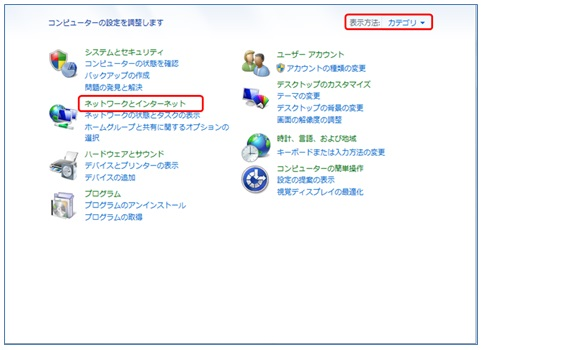
⑥Return to the Control Panel、set the display as「Category」、then select「Network and Internet」.
※In case the display is not on「Category」select「Internet options」、 and proceed to step ⑦.
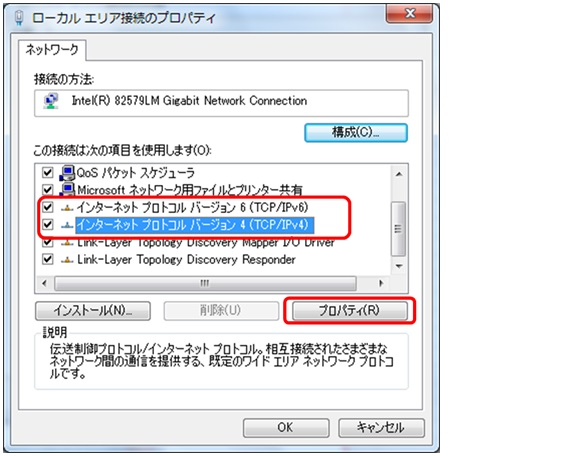
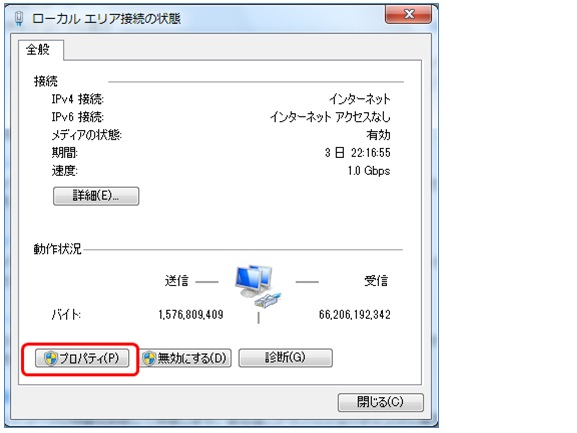
⑨ UNCHECK [Internet Protocol version 6(TCP/IPv6)]。
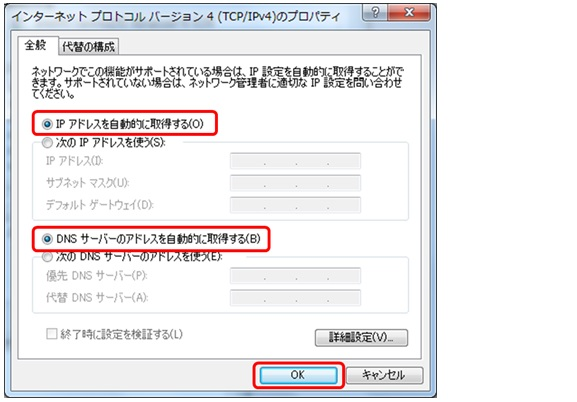
Then check the「Internet Protocol version 4(TCP/IPv4)」, then select「Properties」.
